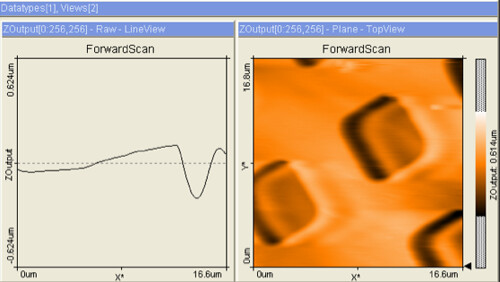
Yesterday I had the good fortune of watching a student’s face light up on the occasion of (what seemed to be) his first encounter with the idea of calibration. We were imaging some microstructure using AMF. (See the image above: the view on the right is top-down, and on the left, as if looking flat across the surface at the location of the arrow, situated at the very bottom right of the top-down view.) I really didn’t know much about the surface I was imaging; I had grabbed a pre-fabricated sample just to introduce the AFM. But I guessed aloud that this piece might be manufactured for calibration of scanning probe microscopes like the AFM we were using, for I had seen other such devices sold for that purpose.
I explained that someone could manufacture a device like this within certain tolerances–plus or minus just so much distance–that could be verified by the best instruments we have. That confidence in measurement could be exported to other instruments by aligning them–calibrating them–so that the measurements they report conform to what we know about this standard sample with known distances and tolerances.
That was a way cool idea to this student. He was himself being calibrated, in a way, by the communication of an idea. He’s in a better position to understand instrumentation, now. So, it seems, am I.


